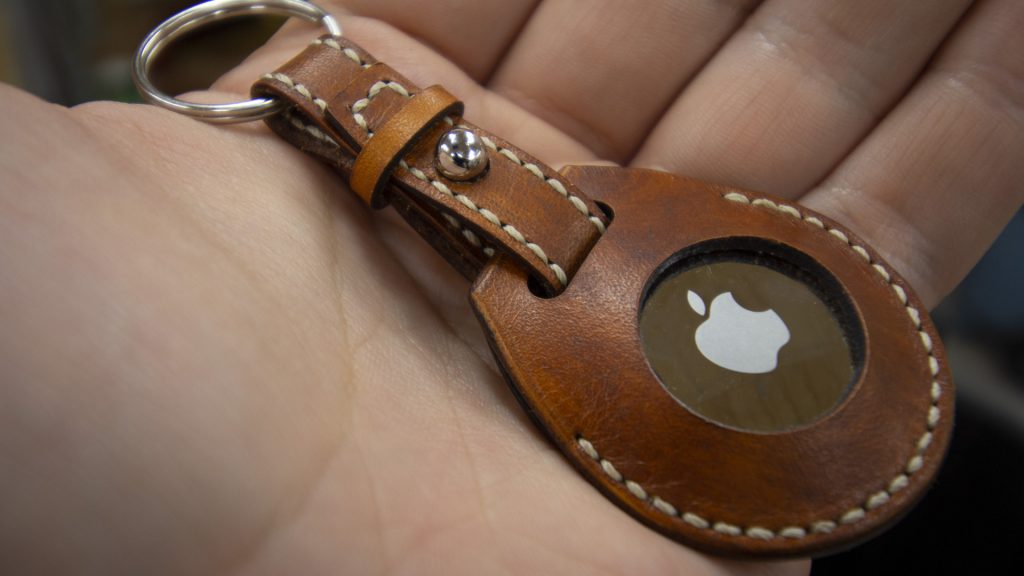
Obligatory final result first! I’ve been wanting to try my hand at leatherworking for awhile now. I love crafting with a laser, and so had been trying to think of a leather project where I could use my laser cutter to cut precise leather parts. When the AirTag came out and Hermès released their $349 (!!!) leather AirTag case, I couldn’t help but find myself inspired to try my hand at making a knock-off version myself.
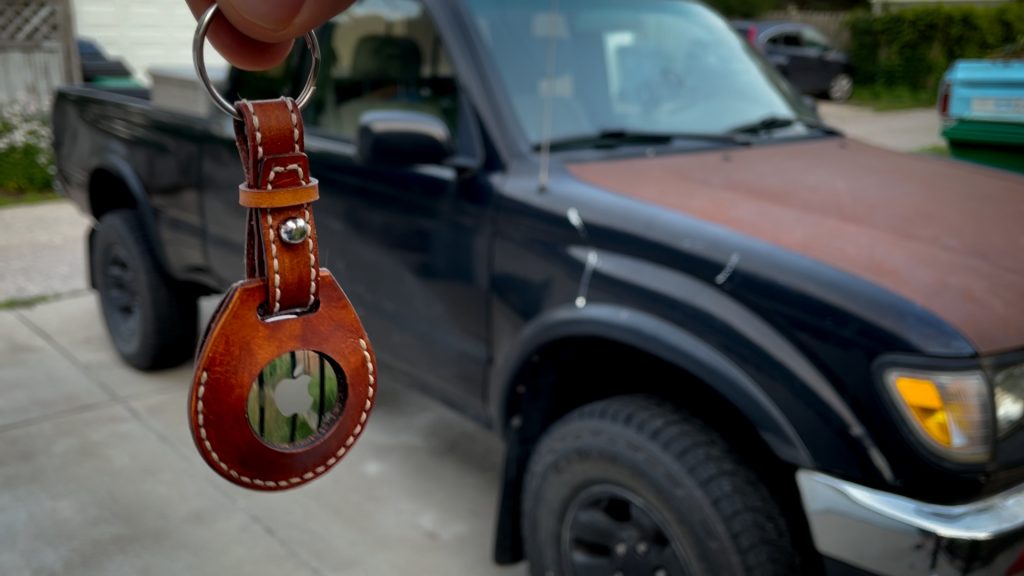
I had no real use for one – honestly, now that I made this, I’ll probably use it as a keychain for my 1996 Tacoma – totally Hermés’ target demographic right? But I had a ton of fun, learned a lot about leather crafting, and think my own leather AirTag keychain came out pretty darn good! Let me show you how I went about it.
The first step in making the leather AirTag case was designing my cut file for the laser cutter. To do this, I pulled the product image from Apple’s website into Adobe Illustrator, then created a circle the same size as an AirTag in real life. With this, I could scale the reference image to the point where it looked like my standin AirTag circle would fit inside, past the stitching, with a little extra clearance to spare.
The most interesting shape to create was the main body of the AirTag case, but the design process for all the shapes was pretty much the same process – referencing the source images and determining what would be the most likely size of the various components.
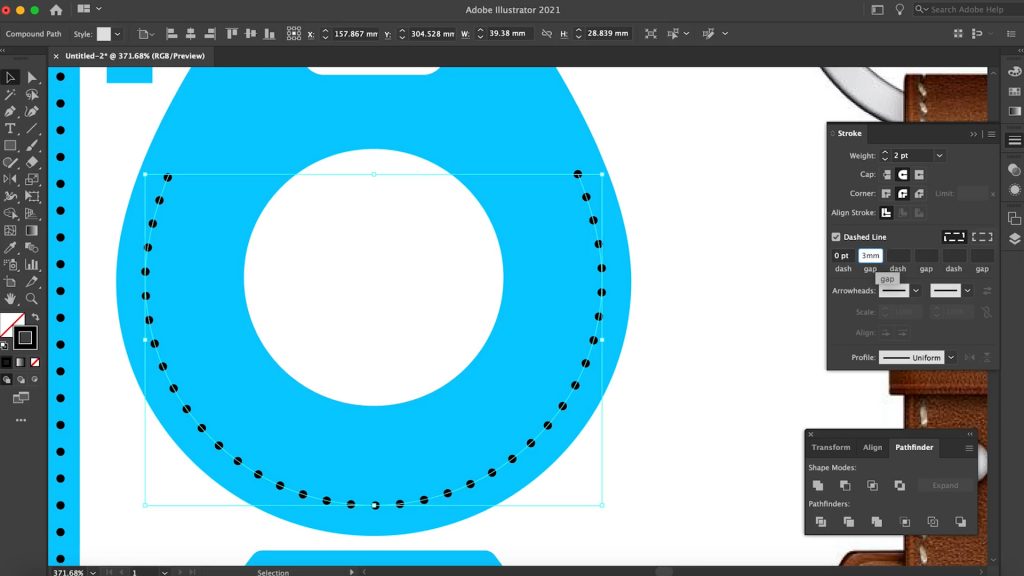
Despite cutting the parts on the laser cutter, I realized it would probably still be a good idea to punch the stitching holes into my leather with actual leather working tools. But I still wanted a reference for myself for where to punch, so I created a dotted line with gap spacing to match the gap of the prongs on the leather stitching chisels I had ordered, which was 3 millimeters. I etched these dots very lightly before cutting the parts out.
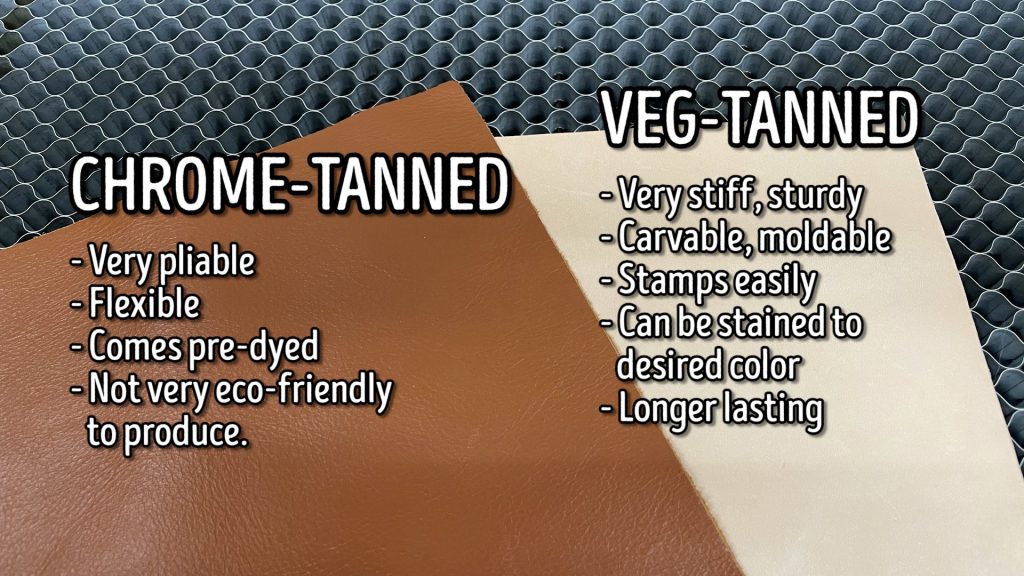
For my initial test / prototype, I had ordered a small panel of leather that I thought would work well for the project. But at the time, I didn’t know anything about the different types of leather – and it turns out I had ordered chrome tanned leather, which I quickly discovered wasn’t really what I needed for this project. So rather than ordering the wrong thing again, I headed into a local leather crafting supply store where the fine gentleman there was able to help steer me in the right direction with 2-3 ounce (0.8mm – 1.2mm thick) veg-tanned leather.
Laser time! Before lasering, I applied a lightweight masking tape to protect the leather from any scorching from the cuts. It’s a low tack masking tape – less tack than even painters tape – that I bought a few years ago, and it’s meant specifically for laser cutting. I’ll put a link down in the description to the stuff I use.
I mentioned earlier that I would be using a stitching chisel to punch my holes, so the first thing to laser was those stitching reference dots. I did this with a light vector pass just to mark where I wanted my stitches to go – not enough to cut through the leather, but enough to make a mark. For each of these “dots” it’s actually drawing a full circle, albeit a tiny one, and it moves between each dot super rapidly – and totally reminded me of a scene from one of my favorite movies…
No? Just me? Okay.
As for the primary cut settings, on my 80W laser, I used 15 millimeters per second at 10% power, with 2 passes. Those were the settings I found that cut through the leather nicely without overly scorching it.
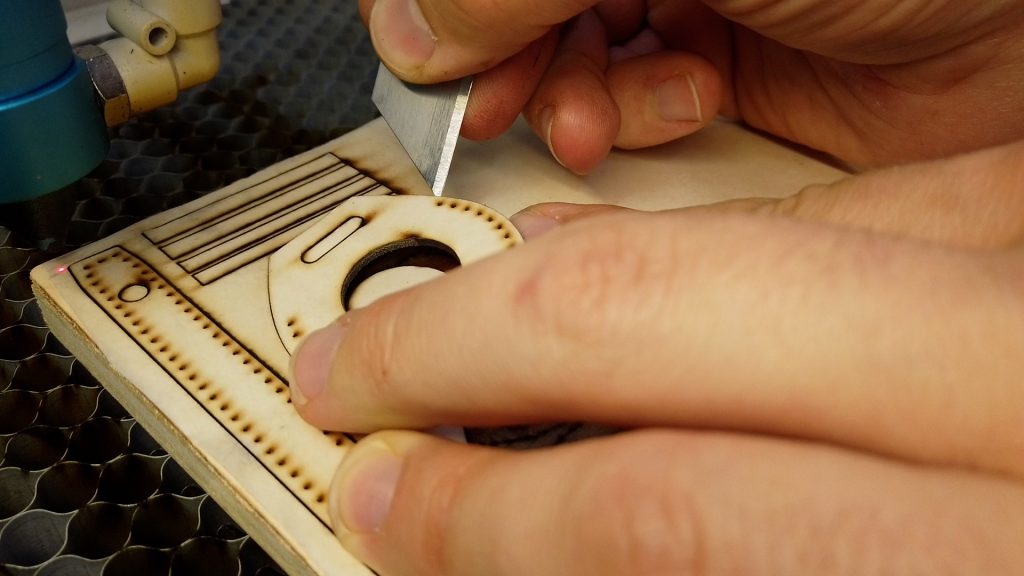
After the cuts completed, I carefully removed the pieces with a utility knife blade so as to not move the leather in case any part hadn’t cut all the way through, but everything had cut through just fine.
With the pieces removed, I removed the masking tape from my parts and got to work on staining. One of the reasons I had avoided vegetable tanned leather initially when I was first looking for leather for my project was because none of them were the warm medium-toned brown I was looking for to best copy the Hermès AirTag case. Turns out veg-tanned leather is almost always sold in its natural light beige color from the tanning process, and then you dye it to the color you want before or after cutting your pieces out. So I bought an all-in-one “acorn brown” dye and finish made for veg-tanned leather, as well as some dobbers for applying and went to work. The instructions said to apply, then let sit briefly and wipe away the excess. In the future I’ll wipe away the excess more quickly, as I could see darker areas in the finished pieces where I had let it sit more. Oh well, character, right?
After letting the leather dye dry for a day or so, I could glue the two pieces of my AirTag case body together. I applied a tiny bead of leather glue around the perimeter where the stitching would be, then paired the two pieces together, being careful to match them up as best as I could. I put a small amount of weight on the pieces to “clamp” them while the glue dried.
One thing I noticed about the real Hermès AirTag case from the product images on Apple’s site was that it appeared to have a nice rounded-over edge, so I wanted to do this on my case too. I used a leather chamfering tool to take off the hard corner of all my pieces.
Then on the case itself, I used varying grits of sandpaper to smooth over my edge and also help remove some of the glue squeeze-out. I finished up with 600 grit sandpaper once I was happy with the profile. Cleaning up and rounding over this edge unfortunately reveals the raw color of the leather again, so I used a q-tip with a little dye on it to re-dye my edges, and let it dry before continuing.
Following the glue-up, I could punch the stitching holes with leather stitching chisels. The set I ordered came with a 1, 2, 4, and 6-pronged chisel, allowing you to choose how many holes you punch at once. I decided to use the two-pronged chisel, in case my dots were at all spaced wrong in my design file. It’s a lot easier to make things line up when you’re effectively cutting one hole at a time. This is because you use the previous hole punched to align your chisel for the next hole. This is slower going, but I wanted to make sure my stitching looked super professional and even, despite me being a total noob.
With the holes punched, it was time to learn how to hand-stitch leather! Huge shout out and “thank you” to the YouTube Channel “Corter Leather” for teaching me this and other things I needed for my project. For larger projects, leather pros typically use a “stitching pony” – which is effectively a large but light-duty wooden clamp – to hold their leather project upright while sewing two-handed. Corter Leather has a great video, which I recommend checking out, that shows a great way to stitch two-handed without a stitching pony.
So since Corter Leather has that video that goes into great detail, I’ll just try to give a high-level overview of what I’m doing. I’m using a wax-coated thread, cut a decent bit longer than I thought I would need so I didn’t run out. Then with both needles in neighboring holes, you sort of “leap-frog” from front to back, having both threads go through each hole but from opposite directions. When doing this, it’s important to apply tension to the thread you’re not working with while working with the other hand to make sure your stitches are nice and tight when all is said and done. This is the sort of thing that takes few instances to remember the steps and feel confident in your motions, but once you get the hang of it, it’s easy to power right through it without needing to really think about the specifics.
Worth noting, if you’re not sticking your tongue out while you work, it won’t come out right. Very important.
Once you reach the end of your stitch, you’ll want to back-stitch a few times to make sure that your stitching doesn’t come undone near the high-stress areas of your project. After doing this, I trimmed the ends of my threads down to about 3/8 of an inch and used a lighter to melt down the synthetic thread, and used the end of the lighter to rub the melted areas down flat against the rest of the thread.
I performed this same process on the belt portion of the case, but because it was a lot more linear, it was a little easier to work with as I didn’t have to rotate it as much, and it was only a single piece of leather so it was easier to pass my needles through. Since this was only a single piece of leather, the stitches here are purely decorative, rather than functional like the ones on the case body themselves.
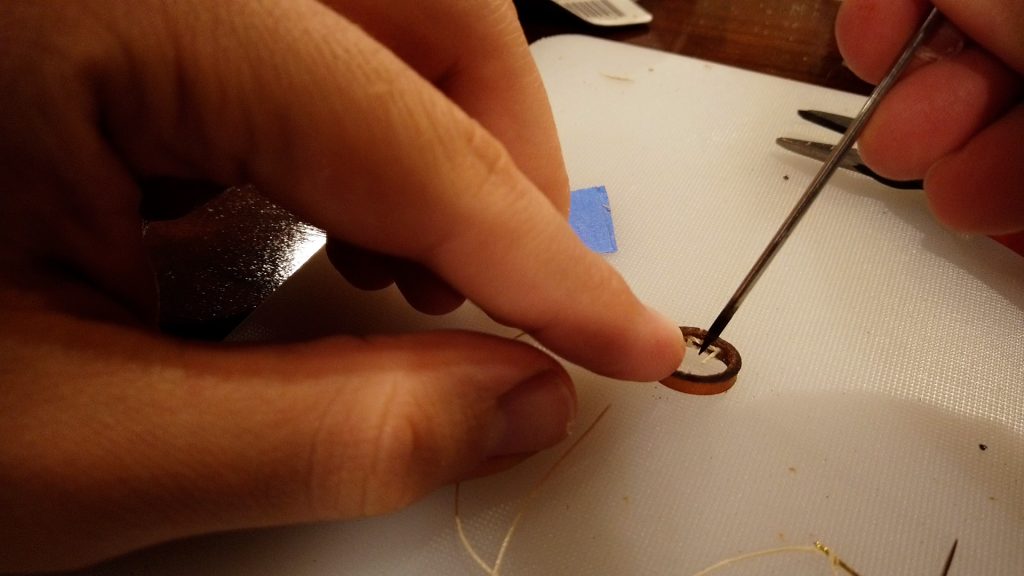
The belt loop was the tiniest piece of the puzzle. I bent it around the area of the “belt” it would be securing and marked how long it needed to be. I then cut it to length with my utility knife. I then punched holes on both ends and, after glueing the ends together, stitched it together with two rows of 3 stitches. To melt the threads without burning myself or the leather, I heated a stainless steel cocktail skewer and pressed them down with that.
Time to burnish the edges! Burnishing is the process of sealing the edges of veg-tanned leather to protect it from moisture and fraying, but it also looks really nice. To burnish my pieces, I used a burnishing agent called “gum trag” and applied a tiny amount of it to the edges with a q-tip. After applying, I used a cutoff piece of an old cotton shirt to rub it into the edge. The heat from rubbing helps the gum trag tack up then cure, whereby I switched to a hardwood burnishing tool to further polish the edge in the groove of the tool. I did a few applications of the gum trag until my edge looked nice and glossy and sealed. And even though I didn’t use the hardwood tool on the other pieces, I also applied gum trag to the edges of those parts to protect them too.
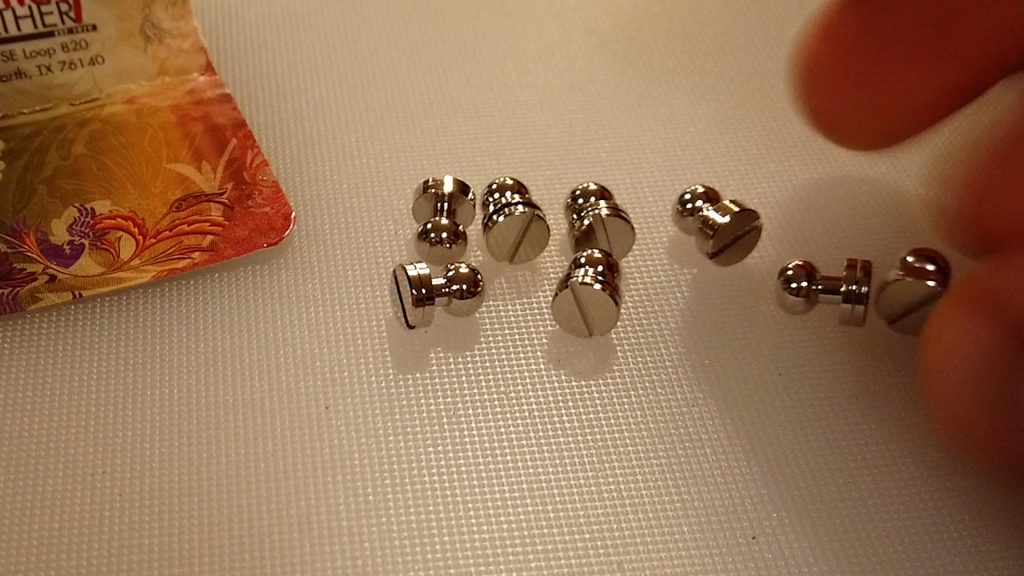
One more step before final assembly. I bought these fancy stainless steel button studs that looked like they closely matched what Hermès used. They have a flathead backing that goes on with a screwdriver, but the guy who helped me at the leather supply store recommended I use a little Loctite on the threads to keep it secure.
I had never worked with Loctite before and it’s a lot less viscous than I would have imagined… so I had to be careful not to drip any of it on the leather. Blooper aside, I used a tiny drop of Locktite, blue formula, on the thread before applying the top of the button stud through the belt.
Once the button stud was installed, I could begin final assembly of all the parts, which turned out to be a bit of a puzzle – as determining the correct order of operations wasn’t as obvious as I thought it would be. I got it all together after a few minutes before realizing I had installed the belt upside down – the loose flap of the belt was supposed to be pointing up towards the key ring, so I disassembled and began my assembly again, referencing the Apple product listing a few times to try to think through the correct order of operations in my head. The trick was to trap the keyring by coming through the belt loop on the bottom with the longer edge, then installing the AirTag case body – making sure to actually put the AirTag in the case, of course, before putting the hole of the now-top-most strap over the button stud and finally through the top of the belt loop to hold it in place.
And there she is, in all of her “didn’t cost me $349” glory, and pretty identical to the real thing if I do say so myself. Now I don’t have any plans to make a ton of these and start a black market of knockoff Hermès AirTag cases – last I heard they were out of stock anyway, so I guess the 5 people who could afford the real ones had scooped them up already.
So with that said, I am going to provide the template I created for this project free with the giant disclaimer that I’m not responsible if you DO decide to make and sell knockoff Hermès products on your own time. As far as I’m concerned, Hermès owns this design, but if you want to make one for your own personal use and have the tools and dedication to do so, have at it!
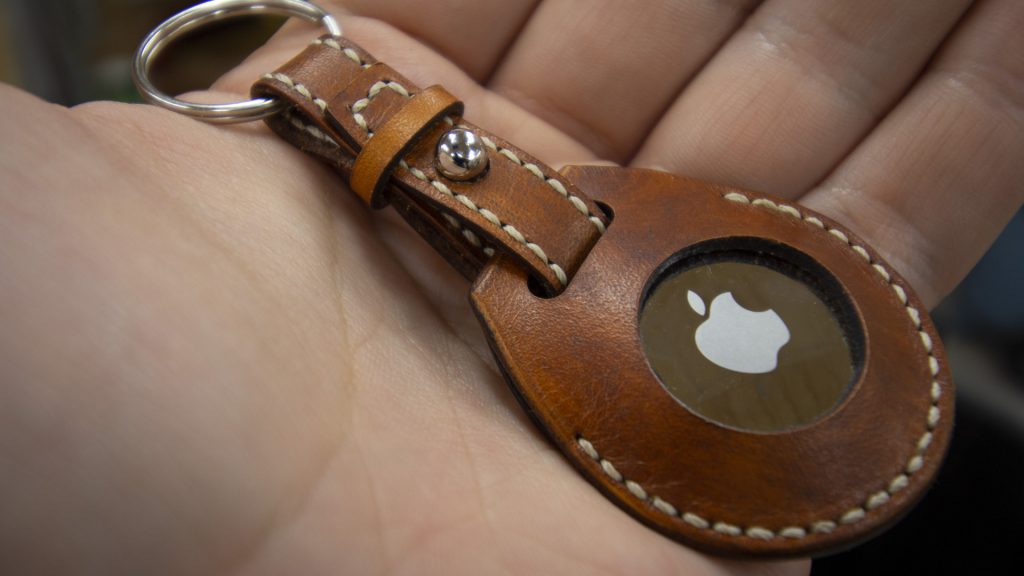
If you’d like to see more about how I made these, be sure to check out the build video at the top of the page. To grab the template, fill out the form below and I’ll send it right over!
Get the template!
Want the template to make a copycat Hermès AirTag case for yourself? Drop me your email and I’ll send the PDF right over, pronto!
Ready to make your own AirTag case?
Adobe Illustrator: https://www.farbulouscreations.com/adobe
2-3oz Veg Tanned Leather: https://amzn.to/3qLyVCI
Leather Dye: https://amzn.to/3hBvNoF
Leather Dye Daubers: https://amzn.to/2UpdFGC
Leather Stitching Chisel Set: https://amzn.to/3qKegiv
Leather Beveling Set: https://amzn.to/3hC1q1s
Leather Burnishing Tool: https://amzn.to/2SKTW3M
Leather Glue: https://amzn.to/3wiaVbm
Wax-Coated Thread and Needle Set: https://amzn.to/2V7JFzD
Gum Trag: https://amzn.to/3heZ5uh
2″ Sanding Discs: https://amzn.to/37RKvTQ
Button Stud Hardware: https://tandyleather.com/products/11310-007-button-stud
Key rings: https://amzn.to/3hiCWLX
Apple AirTag: https://amzn.to/36f6DHs
