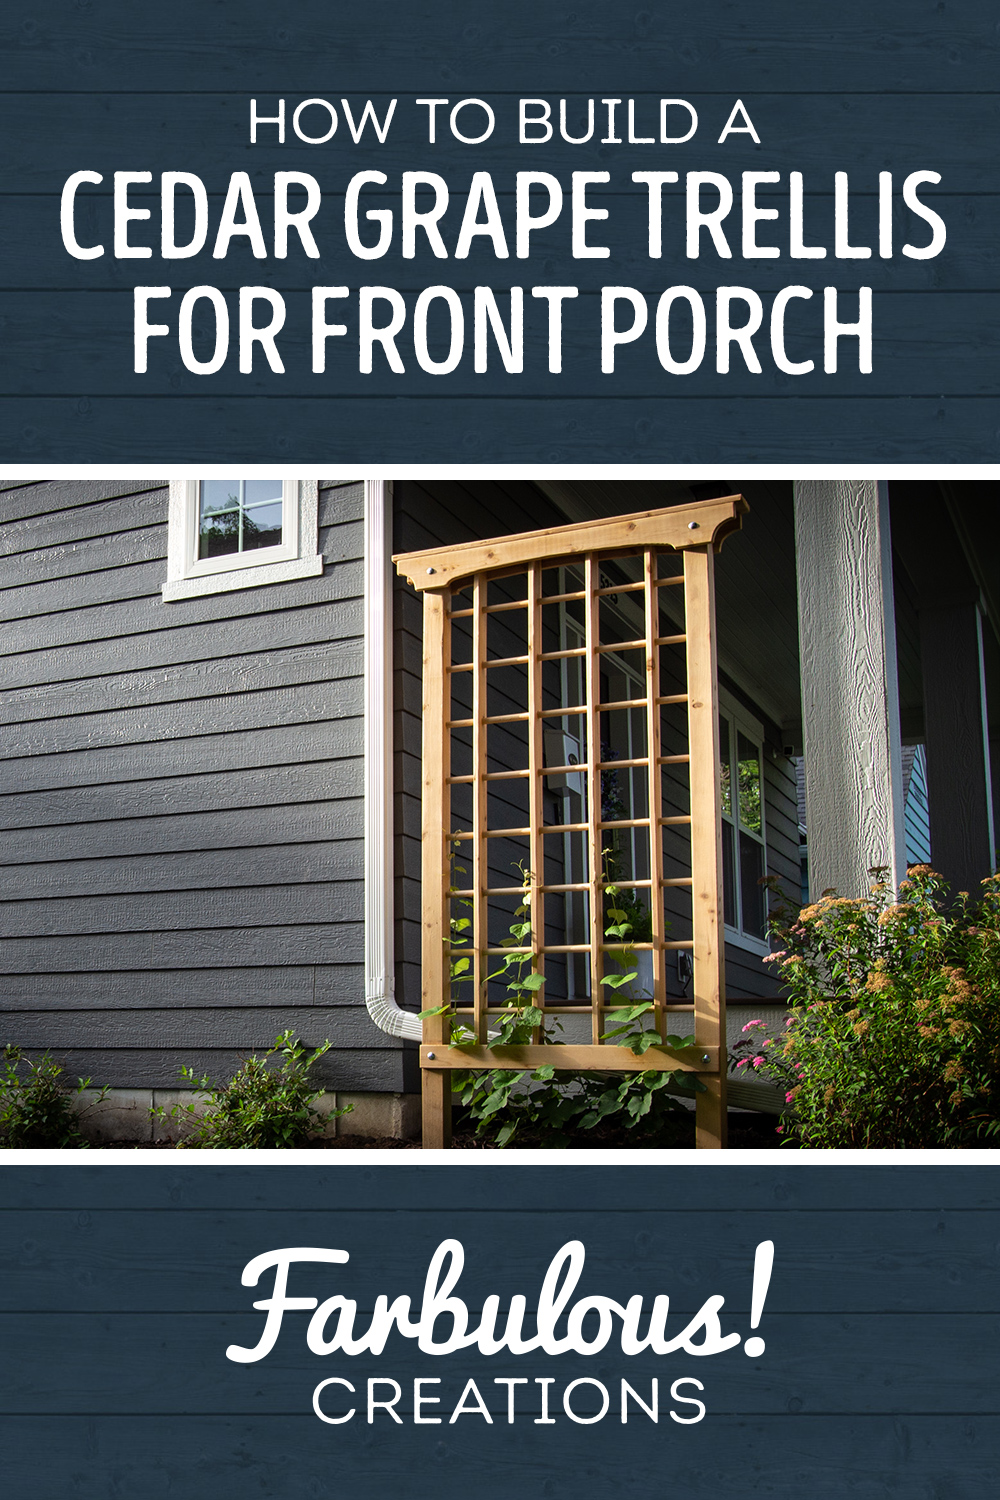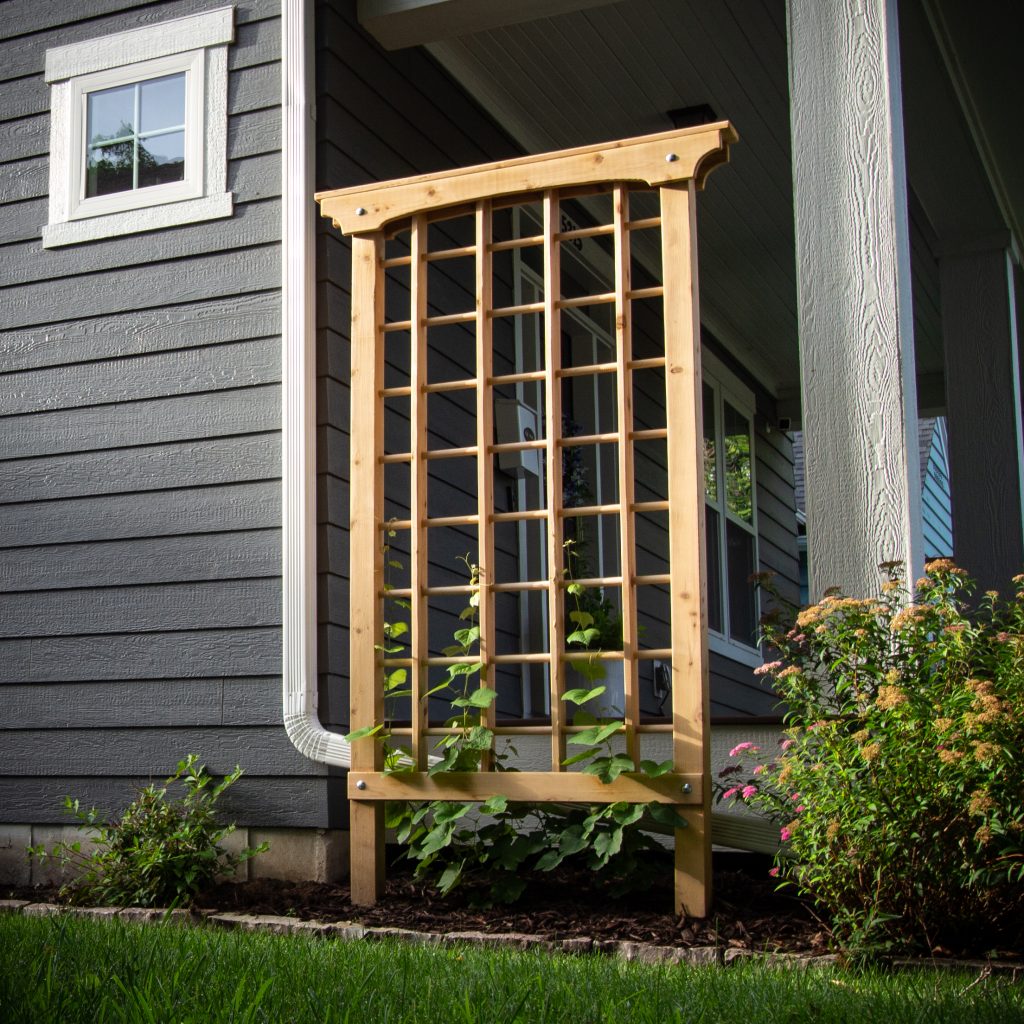
Obligatory final result first!
My husband loves gardening and working outdoors, but because we don’t have a huge yard, we always try to find ways to optimize the space we do have. In this case, we have a covered front porch on our house and underutilized areas to the sides were ripe for the picking – picking of grapes, that is! So we decided to build a grape trellis for each side of the porch, but because it was on the front of our house and not the backyard, looking good was one of my top priorities. After a decent amount of work over the course of a few weekends, I’m happy to report that we were both super happy with how they turned out! I hope you like them too!
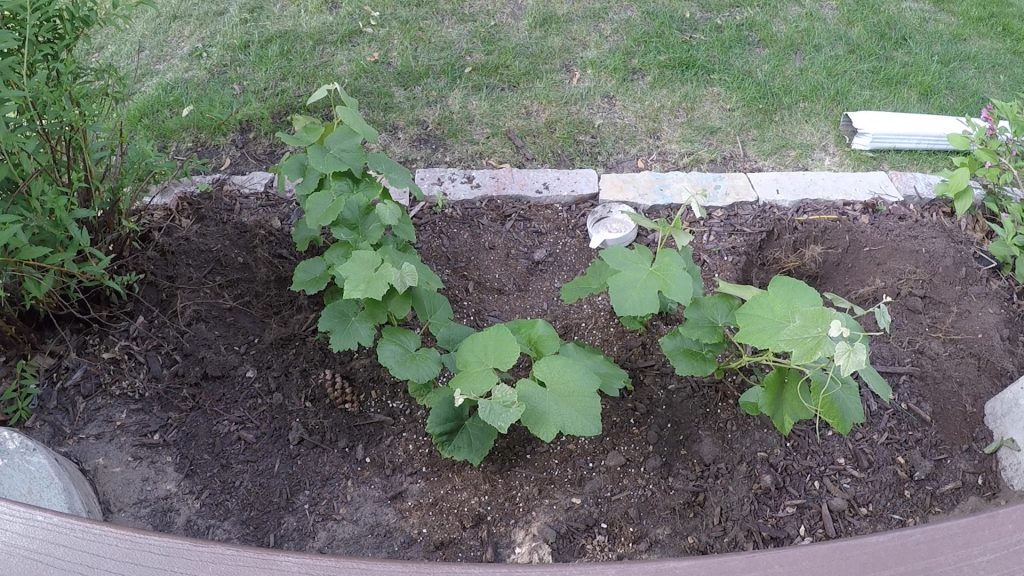
So as I’m sure many married makers out there do, I have a honey-do list that is many miles long. This project ended up getting bumped to the top of the list because the hubby had already bought the grapes and decided they needed to be transplanted to their permanent home sans-trellis. And without anything to climb onto, they were getting a little tipsy.
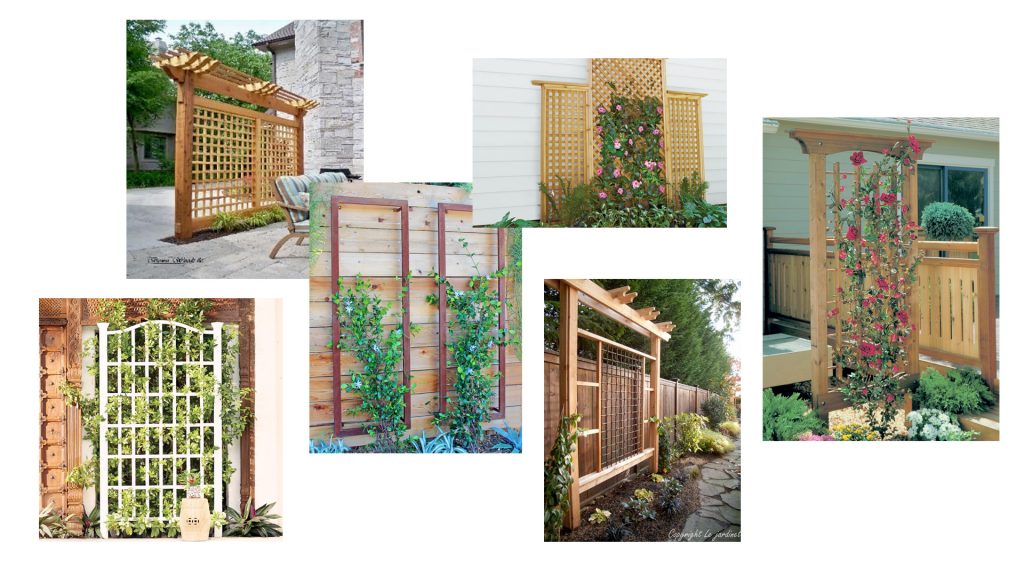
So it was time to get designing. The hubs and I had collected a few reference photos of standalone trellises that we liked. Since we plan to put a pergola over the cement pad we have in the backyard at some point, I figured it might be nice to have these complement each other, despite being on different parts of our property.
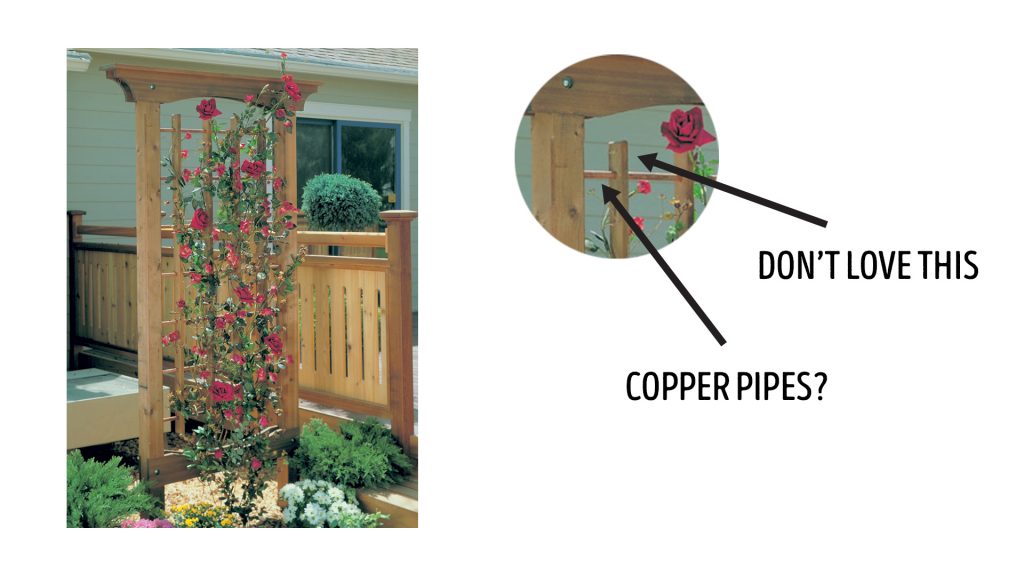
What that meant was leaning more towards a design that had a pergola-like cap at the top and being made of cedar. This rose trellis came up in my search and looked a lot like what I had in my head, but there were a few aspects I didn’t like – for instance, it appears as though the horizontal cross members are made of copper pipe, which I felt like grapes might have a hard time gripping onto, if not get burned in the sun. Also I didn’t love how the vertical cross members terminated shy of the top and bottom – I felt like they should continue through to hide their end grain. Overall I liked it though, and decided to use it as a basis for my own design.
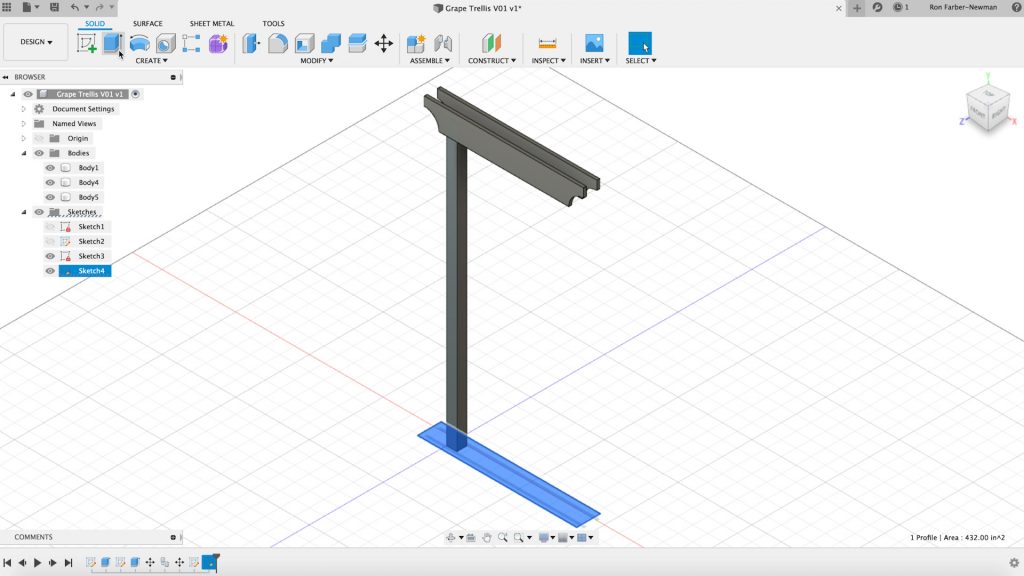
So with that rough idea of what I wanted our trellises to look like, I took to the computer to try to make myself some plans in Autodesk Fusion 360. I really want to learn this program, as when I start doing stuff on the CNC it’ll be invaluable to me, but after an hour of futzing around in there without much luck, I decided to switch to my tried and true Adobe Illustrator. After all, it was a Saturday and I needed to get to the store to purchase my lumber before their cedar supply was wiped out by other weekend warriors.
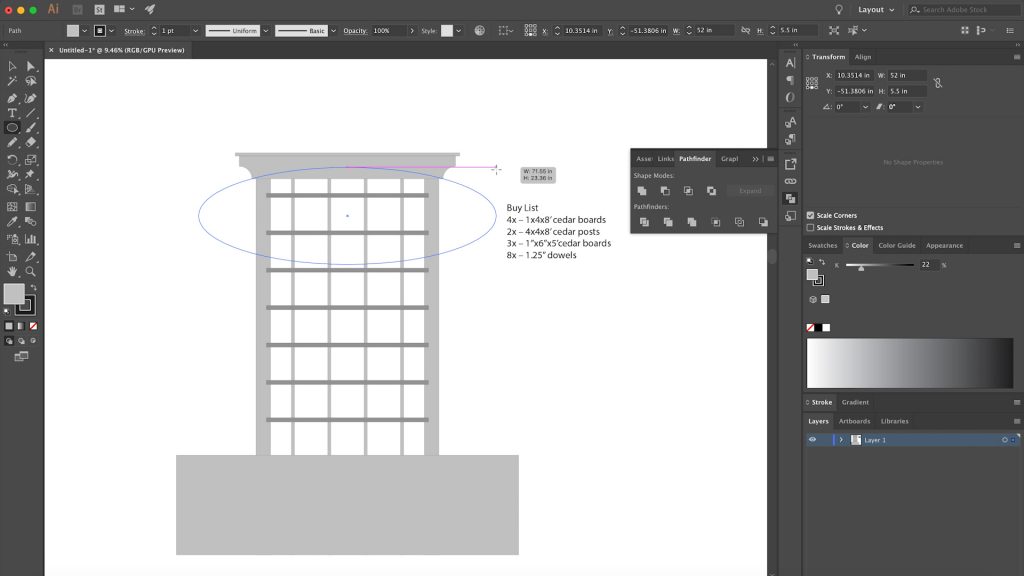
Now I know Adobe Illustrator isn’t a CAD or physical world design program, but I mostly just needed to be able to work in 2 dimensions. This trellis was only going to be about 6-8 inches in depth and I could do what few 3rd dimension calculations there were to do in my head. So ignoring the 3rd dimension temporarily, I used Illustrator to plan out the front profile.
The most important measurement for these things would be the width, as I wanted them no wider than the area between our house and the back of the column. But since the widest part of the trellis would be the cap that sat atop the trellis as a decorative feature, I need to allocate some of the max width to that. This brought down the overall climbable width for the grapes to about 44”. It would have been nice to have more area for the grapes to climb, but compositionally this made the most sense to me.
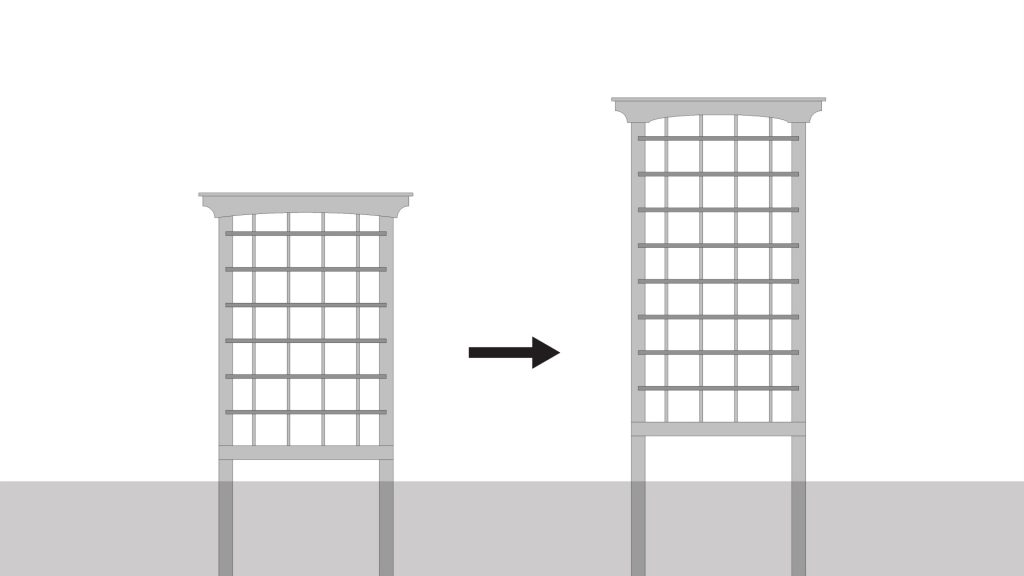
Originally when doing the design, I was planning on using 8 foot cedar posts for the “frame”, resulting in a trellis that was 6 feet high after burying 2 feet in the ground. This raised it a decent amount off the ground, but from the perspective of someone actually up on the porch, they appeared to only be maybe 4 feet high, because the porch itself is a few feet off the ground. I was prepared to be okay with this, but while I was getting my lumber I noticed they had 10 foot 4×4 cedar posts too, which I initially didn’t know was a thing. So I tweaked my design a bit to be 2 feet higher and went with those instead, as it meant the final trellises would be 8 feet tall once completed, which felt a little more natural from up on the porch.
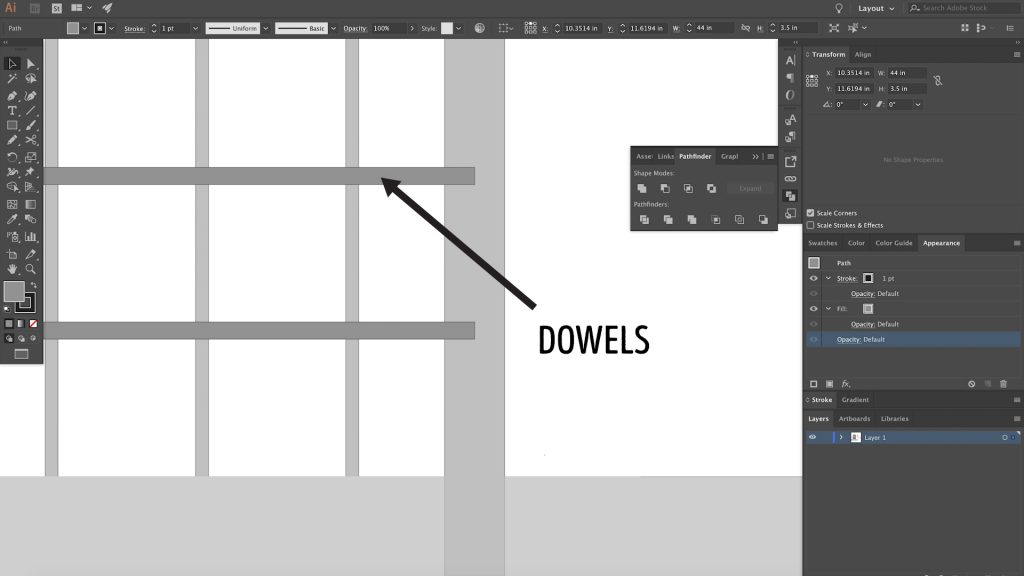
For the intersections between horizontal and vertical supports on the internal framing, I would have loved to have used the same size boards for both and done lap joints with squared lumber. But I’m a pretty novice woodworker in that I’ve never done anything this large and structural, nor have I done much traditional woodworking or complex jointery. So trying to get that many lap joints perfectly aligned for the first time on 10 foot cedar posts that cost about $45 each didn’t exactly sound like a good time. So what I decided to do instead was use dowels for the horizontal crossmembers. All that this required was perpendicular holes drilled through all of my vertical pieces where dowels could simply be slid through to create the internal framing. The downside to this was that 1” dowels at the store were kinda spendy for what they were, and I needed 16 of them (8 for each trellis), but it was a tradeoff I was willing to pay to simplify my project.
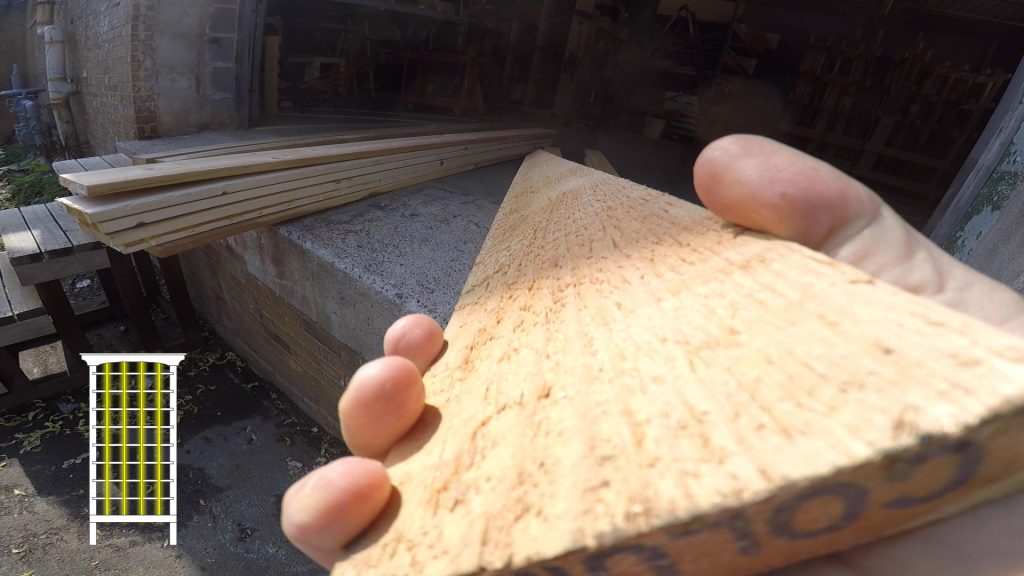
After collecting my lumber, I had a bit of prep work to do with some of the boards. Despite wanting to do most of this in my driveway, there were a few tools at the maker space I’m a member of that made a few tasks easier. One of the most critical parts was on the thinner boards that made up the vertical uprights between the two primary posts. The size of board I needed here was only available in S3S. (If you’re unfamiliar with this terminology like I was when I first got started, that stands for “surfaced 3 sides”, meaning the 4th side is completely rough sawn and splintery, straight from the sawmill.)
I wanted my trellises to look good from all sides, so I needed to plane down the roughness on this 4th side on all of these boards. I don’t have a planer at home, so thankfully the maker space did. This made quick work of all my boards and smoothed them right up. If you can find the proper sized boards that are already planed on all 4 sides, obviously you wouldn’t need to do this.
After the boards were all planed, I decided to drill my holes through all of them while I was still at the maker space. I have a drill press at home, but it’s smaller, and the one at the maker space is a standing unit with a lot more vertical working area. With this increased working area, I was able to clamp my boards together before drilling the holes, allowing me to get away with only marking a few of the boards, rather than all of them. This would also reduce the chance for error on hole spacing from board to board, ensuring the dowels lined up through the boards without any problems.
One other thing I decided to do while I was at the maker space was to use the bandsaw to cut the quarter circle out of the decorative cap faces. I could have done this with the jigsaw at home, but I for some reason don’t have any proper sawhorses right now so this was easier.
Alas, I forgot to cut the bottom arch while at the maker space, so I would need to whip out the jigsaw later anyway. After the circles were cut, I smoothed them out on the belt sander and then routed the edges on the router using a 1/4 inch roundover bit.
Once home I realized my mistake of forgetting to cut the bottom arch, so I printed out a 1 to 1 scale template of the face and transferred the template to the piece of wood. Since I didn’t have any suitable sawhorses, I clamped both the front and back boards together and raised the boards up off the tailgate of my truck by using clamps. This worked… not great, but good enough. A lot of sanding on the belt sander and cleanup with the random orbital sander needed to be done afterwards to get a passable finish on this cut. Hopefully next time I remember all of my cuts when I have access to the tools to do them properly.
One thing I had done before heading to the maker space to prep the rest of the lumber was drilling the holes in the cedar posts that would receive the dowels. Like I said, I have a drill press, but it’s small. These cedar posts, while large and heavy, weren’t so bad to contend with by having the drill press resting flat on the driveway, with the overhanging end supported well. Each trellis would have 8 dowels, so on each post I drilled half way through the post with a forstner bit as to have a clean flat-bottomed hole.
I was using 1 inch dowels, so I used a 1 inch forstner bit as well to drill all of the holes in this project. But during some initial test fitting, I discovered that it was quite the friction fit, such that trying to slide each of these 8 dowels through 4 boards was going to be quite challenging. I soon learned that a 1 and 1/16th inch forstner bit would have been more appropriate for the holes to make the 1 inch dowels fit easier, but they were already drilled and I didn’t have that size bit anyway, so I instead decided to sand the dowels down a little bit.
Had I a lathe, I would have chucked each dowel up and made quick work of the sanding that way, but I didn’t have a lathe so instead sanded each dowel with the random orbital sander while rolling it by hand in the driveway. This is HANDS DOWN one of the more tedious tasks I’ve ever created for myself, but when you don’t have the right tool for the job, sometimes you’ve gotta improvise. Oh, and before sanding, I cut the dowels to size on my miter saw to make sure I wasn’t sanding more than I needed to.
After repeated tests to make sure each dowel finally fit the 1 inch holes of the vertical uprights loosely enough, I could finally begin assembly.
After placing all of the dowels in one of the uprights, I laid one of my 10 foot cedar posts down in my driveway, hole-side outward facing the dowels. After fiddling momentarily to get all 8 holes lined up with their mating dowel, I stood the assembly up on end. Using my hammer, I tapped all the dowels lightly until the pitch of the “thud” changed slightly letting me know they had bottomed out in their holes, guaranteeing the trellis would be the same width at all points once assembled.
I then began the slightly tedious task of getting the first vertical upright into its final position. I cut two spacer boards for spacing the uprights, one for the outermost ones and one for the inner ones, to make sure the spacing was correct along the length. But I also struggled with this task, again because of how tight the holes were on the dowels.
After trying a few different methods of tapping the upright down, I landed on the most absurd looking method that turned out to be the most effective – and that was using a 3-4 foot length of 2×4, held tight in one arm and guided with my opposite hand to tap the board down, changing my strike to land between different dowels as the board lowered into place.
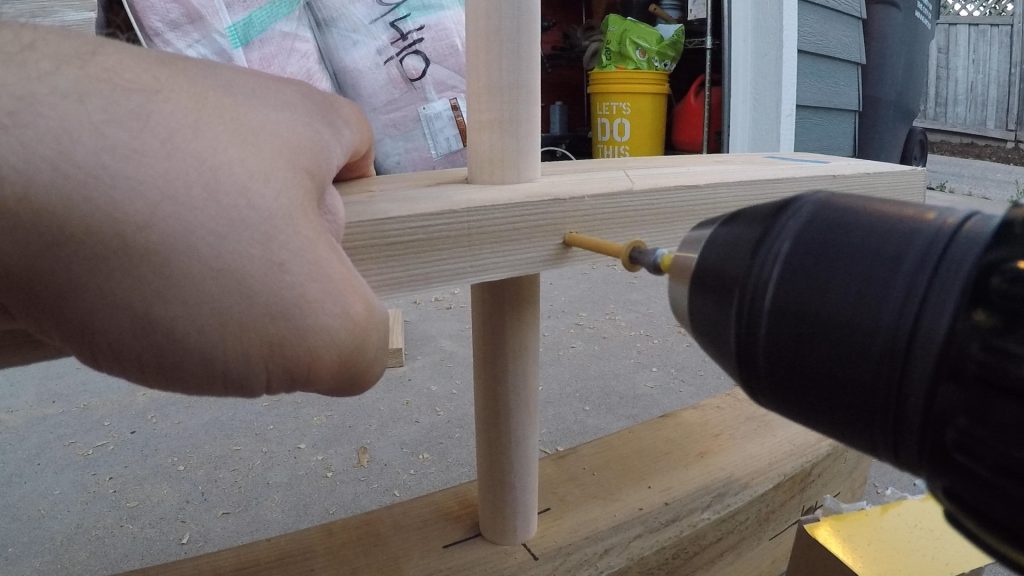
Once my smaller spacer board fit perfectly into each gap, I secured the board in place with a few screws so that further vibration wouldn’t cause this board to lose alignment.
With my brute-force-esque technique down, the next three boards went quite quickly. For each upright, I used my spacer block as the board got close to its final position and then again used screws to secure it to the dowels with pre-drilled holes.
After the final horizontal upright was tied in, I hoisted the other 10 foot 4×4 up on top. This was also a moment of truth in a way. With the lower boards, if the alignment of the holes was slightly off, the dowels had plenty of length to accommodate minor fluctuations by bending ever so slightly. But here at the top of the assembly, with only about 7 inches to work with, they would be far less likely to be “convinced” if their placement was off. Thankfully I didn’t have any issues, and the second post went on relatively smoothly. After using a few more screws to tie things together, it was time to call it a night, as the sun had retired for the evening.
The next morning, with the internal framing all done, I could turn focus to the decorative cap. This would be attached with 6 inch by 1/2 inch carriage bolts. I drilled oversized holes in the 4×4 posts themselves, but the faceplates themselves got a 1/2 inch hole to perfectly receive the carriage bolt. Because carriage bolts have a square shaft directly below the rounded cap, I needed to chisel out the corners of the front board’s holes to make them square.
The holes in the 4×4 posts were oversized to make aligning the front and back boards easier, but it also came in handy later to adjust the leveling of the cap on one of the trellises that looked a little crooked at the top once we had set it in the ground.
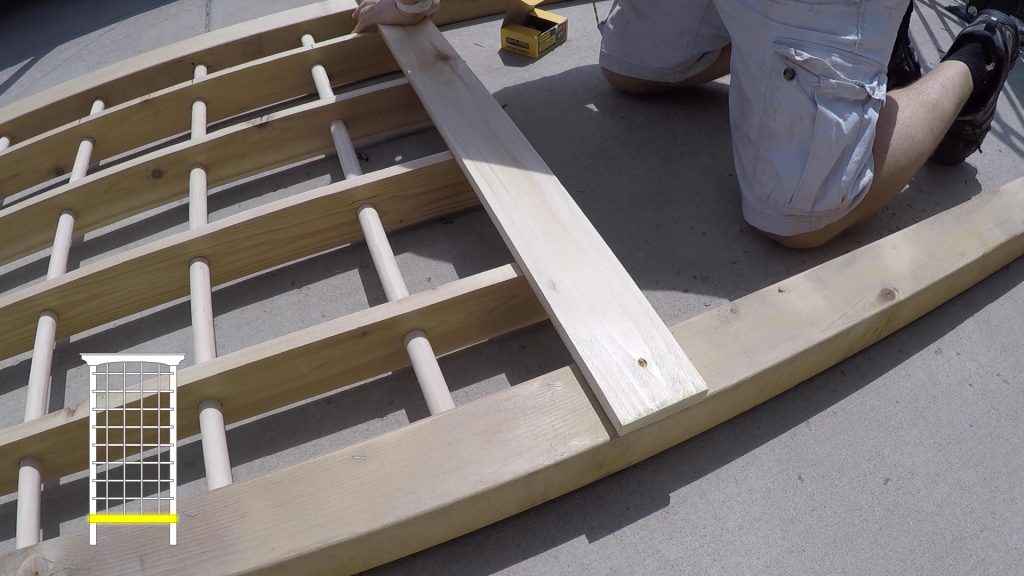
After the cap was secured, only one more piece was needed, and that was the horizontal cross-member along the bottom of the trellis to hide the bottom ends of the vertical uprights. I just used screws to secure it to the 4×4 here, but later decided to replace these with carriage bolts to look a little more polished and match the top of the trellis.
With the first trellis done and the hubby’s seal of approval, he got to digging two feet down for the posts to go in.
With the holes dug, we carried it into place and carefully raised it up and set it down in the prepared holes. The hubby held it in place while I went through my perfectionist-fueled inspection from various angles to make sure it was placed correctly before we leveled it.
We ended up kicking a little dirt back into one of the holes to help level it from side to side, before using a spare 4×4 to hold it in place while we leveled it from front to back. Once I was satisfied with how it looked from every angle, we could secure the posts into the ground.
We decided to use an expanding foam post filler I’d seen used a few times in various videos, rather than mess with mixing cement. It’s incredibly strong and quick setting, and pretty easy to use.
My only complaint was it was hard to know when to stop filling a hole as to not have too much overflow. On one we mounted we poured way too much and it sort of did a mushroom cloud type effect, requiring a lot to be cut off. On the other, I tried dividing a single bag of post filler between two posts, but that ended up not being enough and I needed to use another one. In truth this is likely our fault as we didn’t dig the holes as wide as the bag implied, since this was a tight space with grapes already planted, but it wasn’t too big of a deal.
Once the foam had cured, I used my reciprocating saw to cut off the excess, and then, don’t laugh, used my shop vac to clean up the foam “dust” from the dirt nearby the posts. Yes, I was vacuuming outside.
After cleanup, we could reapply mulch to cover the holes and foam and call this project complete.
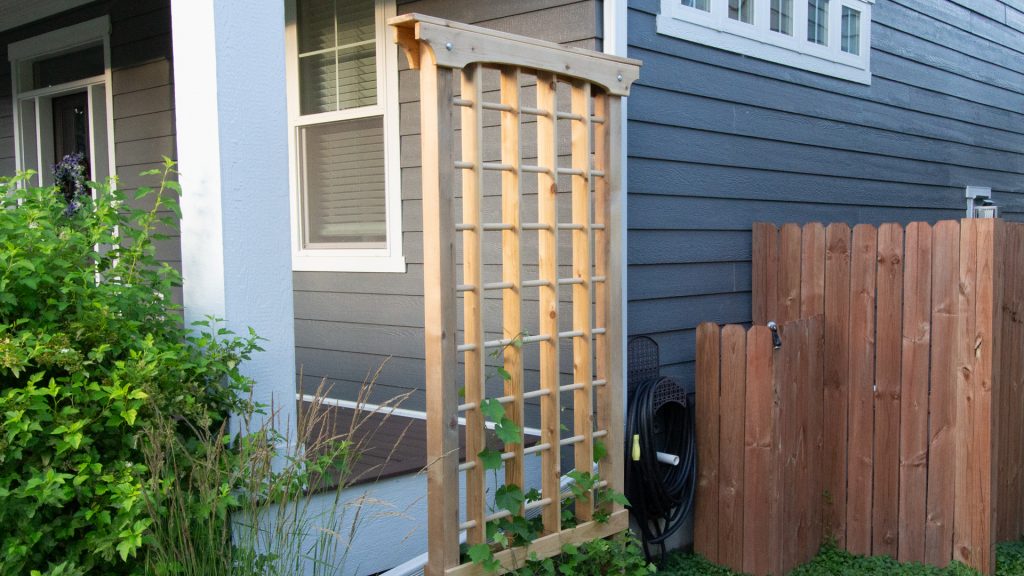
That is, after building a second one and doing it all over again on the other side of the porch.
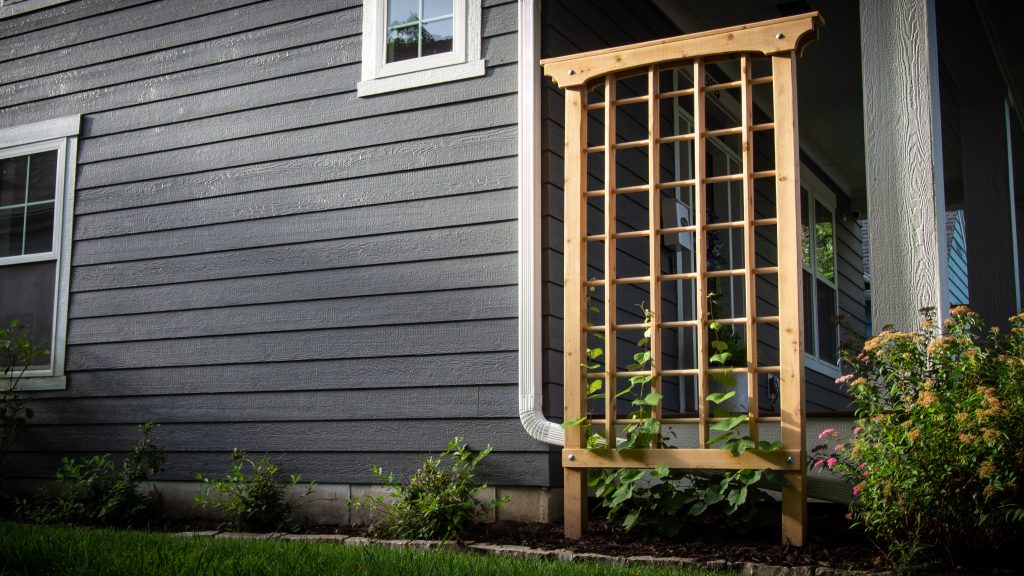
Well there you have it! This was quite the project, and the largest thing I’ve ever constructed, which made it somewhat intimidating. Despite running into a handful of really silly hurdles along the way, it was a great learning opportunity and I loved how they turned out.
If you’d like to see more about how I made these, be sure to watch the full build video at the top of the page or by clicking here.
Ready to build this yourself?
Below are links to various tools and materials used in this project to get you going. As a heads up, some are affiliate links which allows me to receive a small commission if you buy something, at no extra cost to you. Every little bit helps me continue making videos like this, so I appreciate your support and consideration!
Adobe Illustrator: https://www.farbulouscreations.com/adobe
DeWalt Cordless Drill: https://amzn.to/2X2IgbX
Drill Press: https://amzn.to/3h6t0SS
Ryobi Reciprocating Saw: https://amzn.to/2ZxuuiI
Dewalt Random Orbital Sander: https://amzn.to/2WnmY8c
Rigid Shop Vac: https://amzn.to/3ew8SaQ
Expanding Foam Post Filler: https://amzn.to/3h68mSP
Fence Post Level: https://amzn.to/3fyuXqL
24 Inch Level: https://amzn.to/3ewyQer
Post Hole Digger: https://amzn.to/3j5Tbe0
Decking Screws: https://amzn.to/2ChJqsH
6” Carriage Bolts: https://amzn.to/38ZdN2P
1 1/16″ Forestner Bit: https://amzn.to/3h2z3Yl
